Getting started: your first optimized routes in 3 minutes
7 steps3 min read
This guide takes you from a new account to optimized routes on the map. You need a list of delivery addresses (or you can try sample stops) and the number of drivers you have today.
In this guide
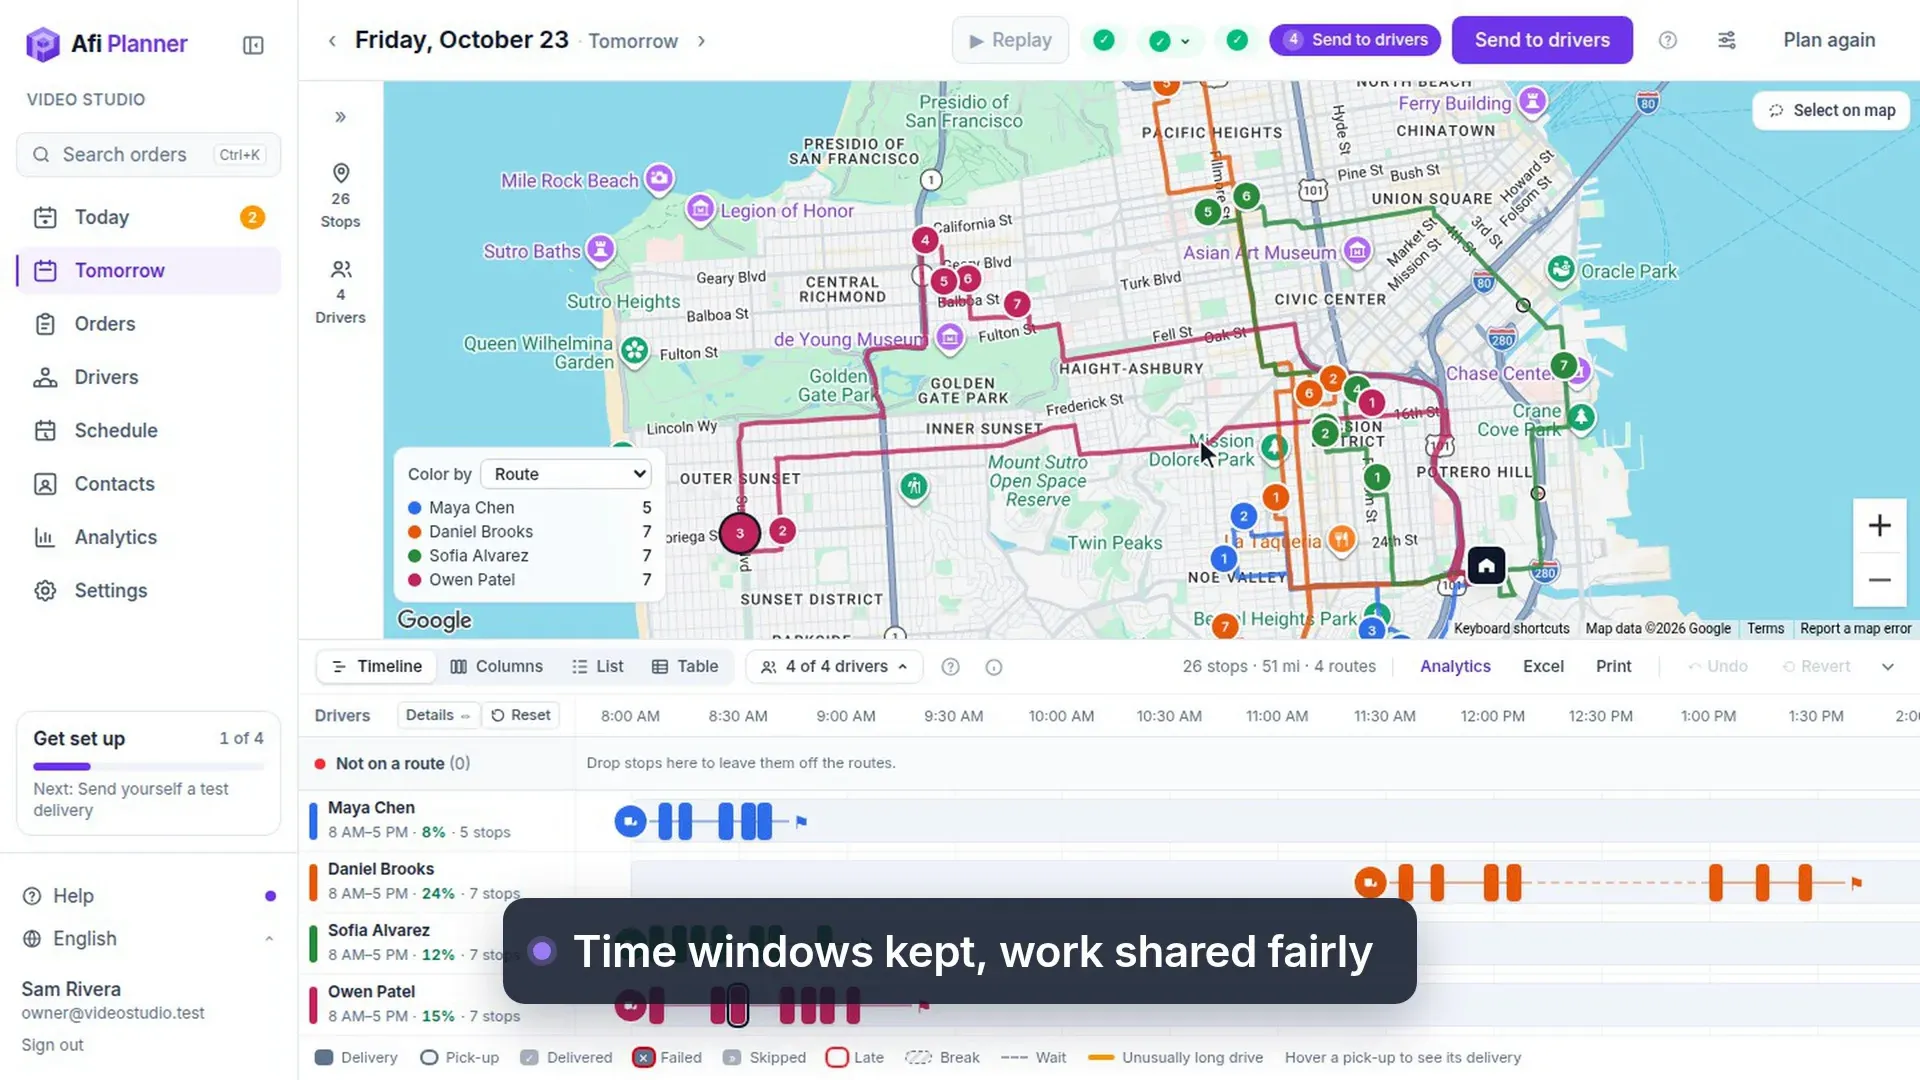
Step 1: Create your account
Go to the sign-up page and enter your company name, your email and a password. Your free trial starts right away: 3 months, every feature, up to 500 stops per plan.
Step 2: Set your depot
Type the address your vans leave from and pick it from the list. Afi Planner uses it as the start and end of every route and sets your time zone and miles or kilometers from it.
Step 3: Add today’s stops
Click Import and paste rows from Excel or Google Sheets, or drop in a file. Only the address is required. No list handy? Download a sample file near your depot and import that.
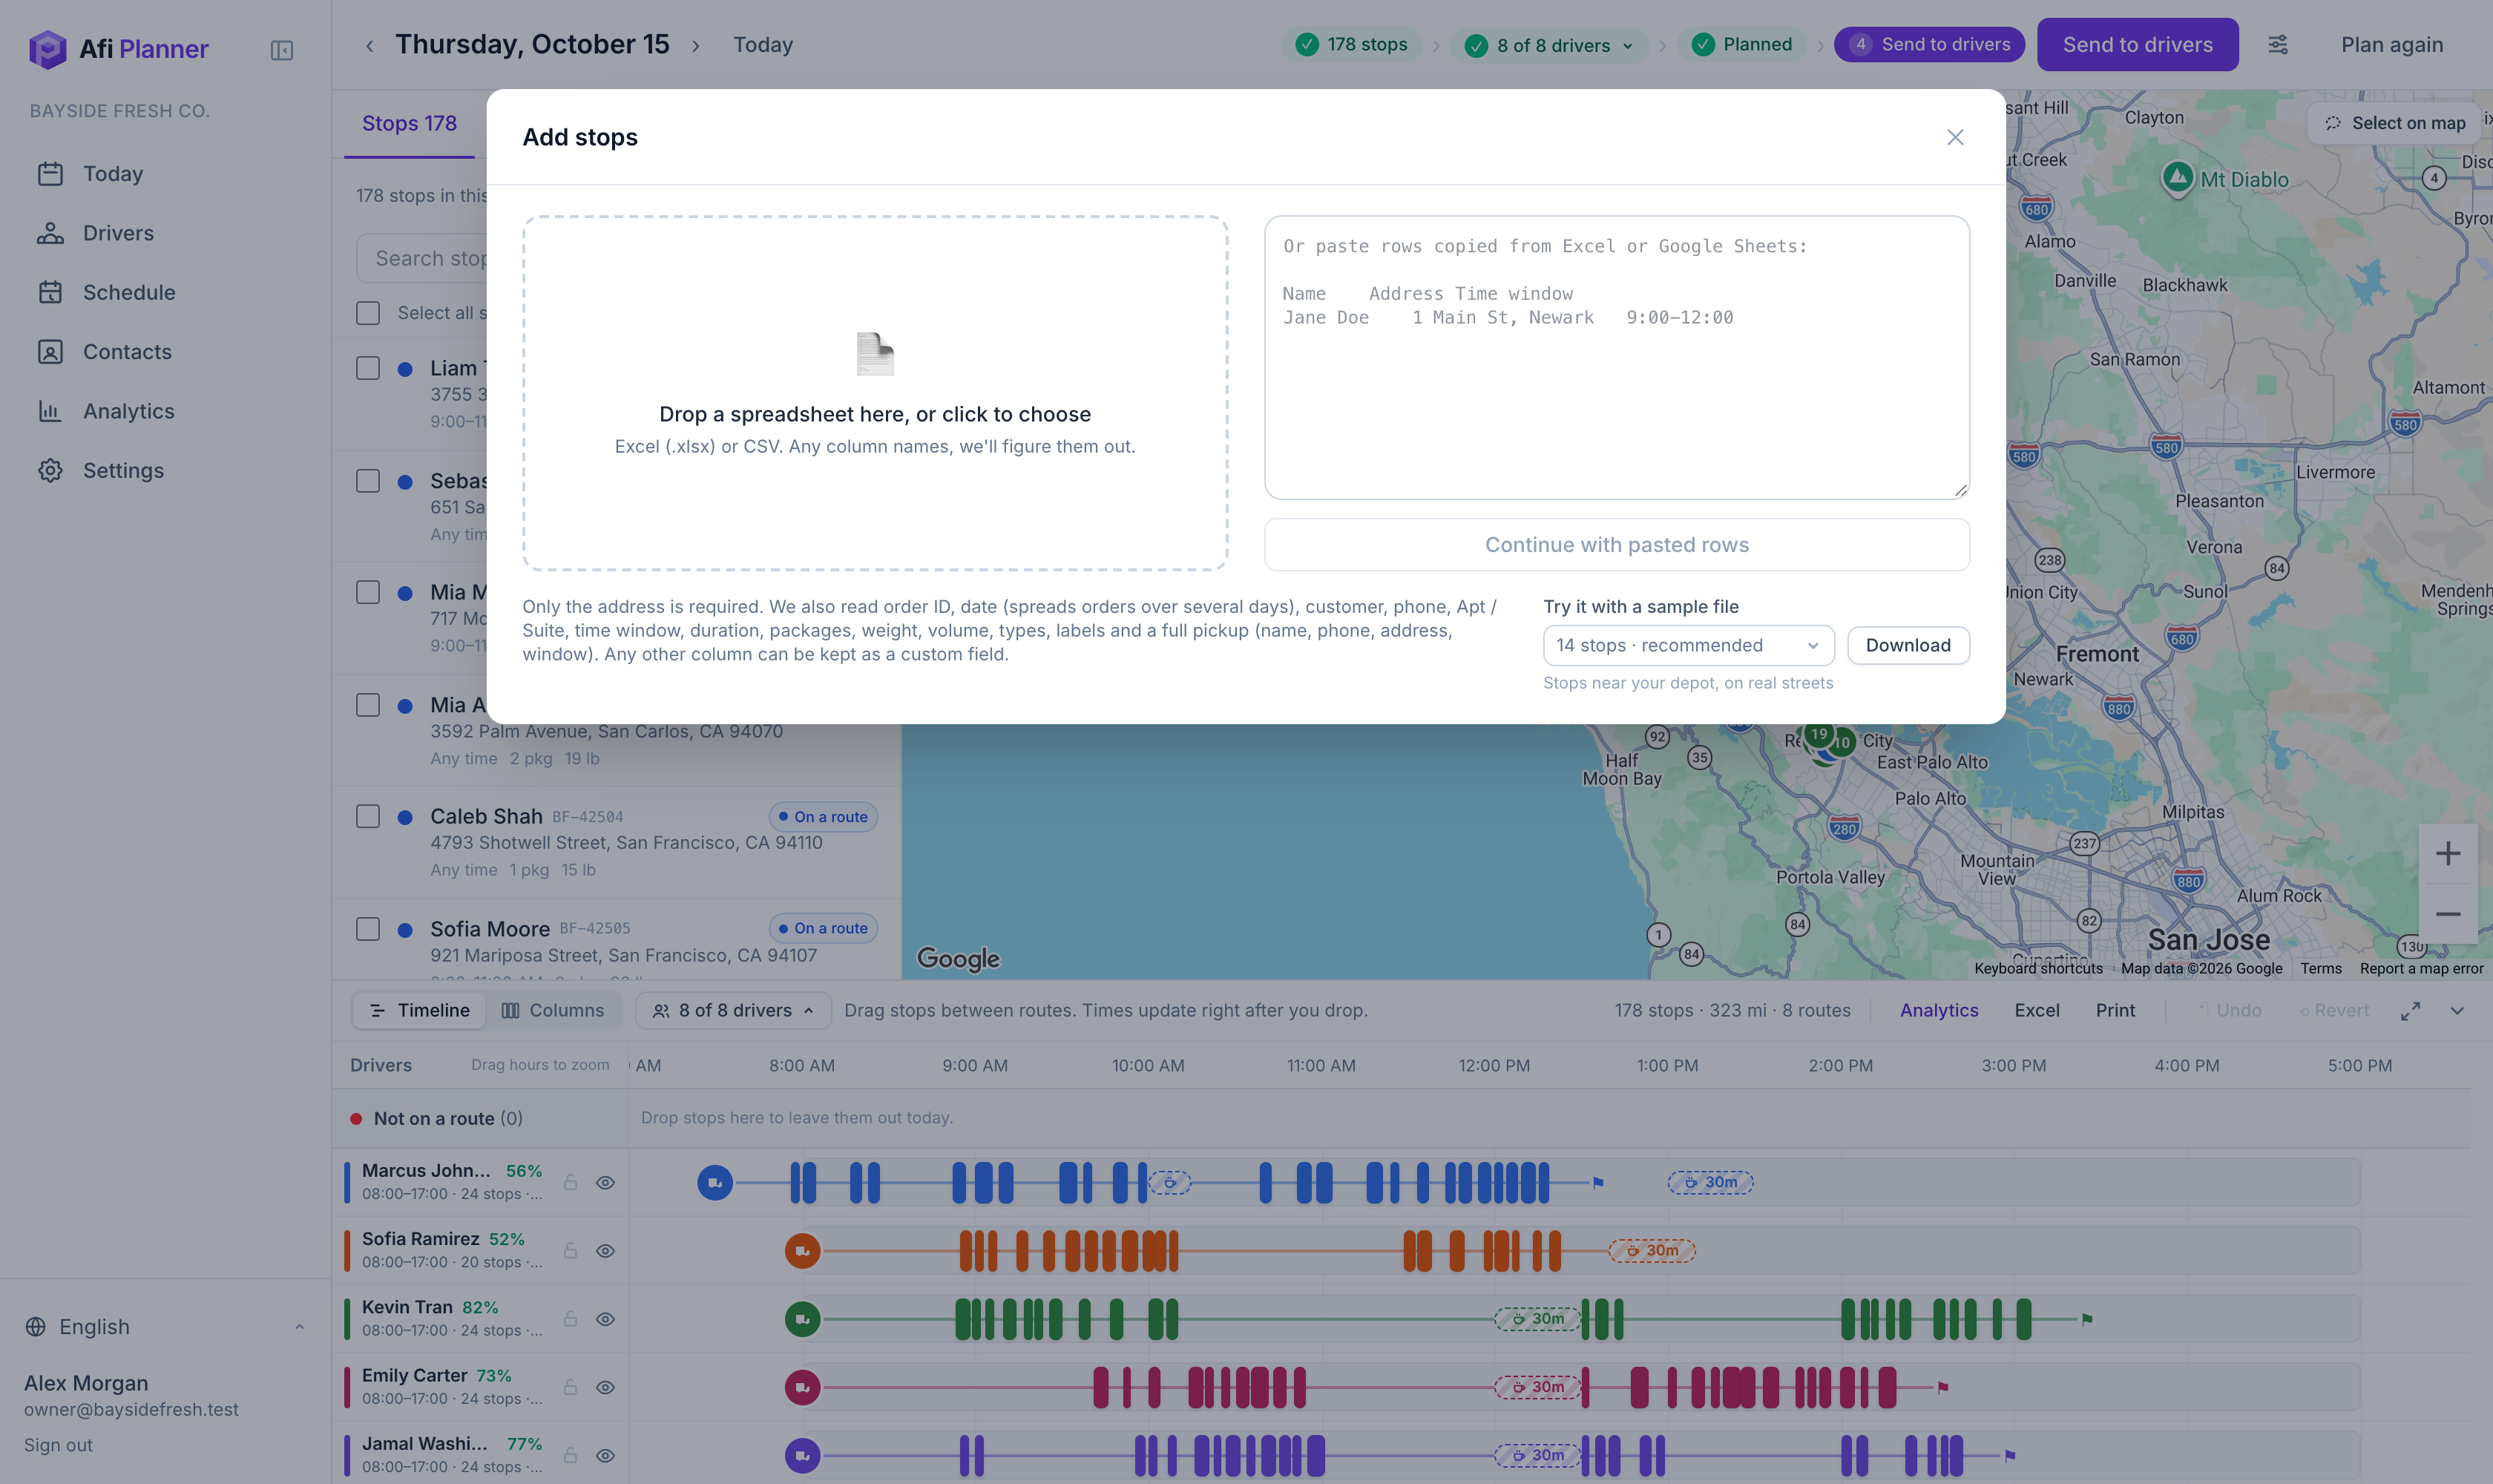
Step 4: Add your drivers
On Drivers, enter how many drivers you have today. Afi Planner creates them with your company’s default hours; rename them and add phone numbers whenever you like.
Step 5: Plan the routes
Click Plan routes. In under a minute every driver has a route on the map and a timeline below it. Anything that couldn’t fit is listed under “Not on a route” with the reason.
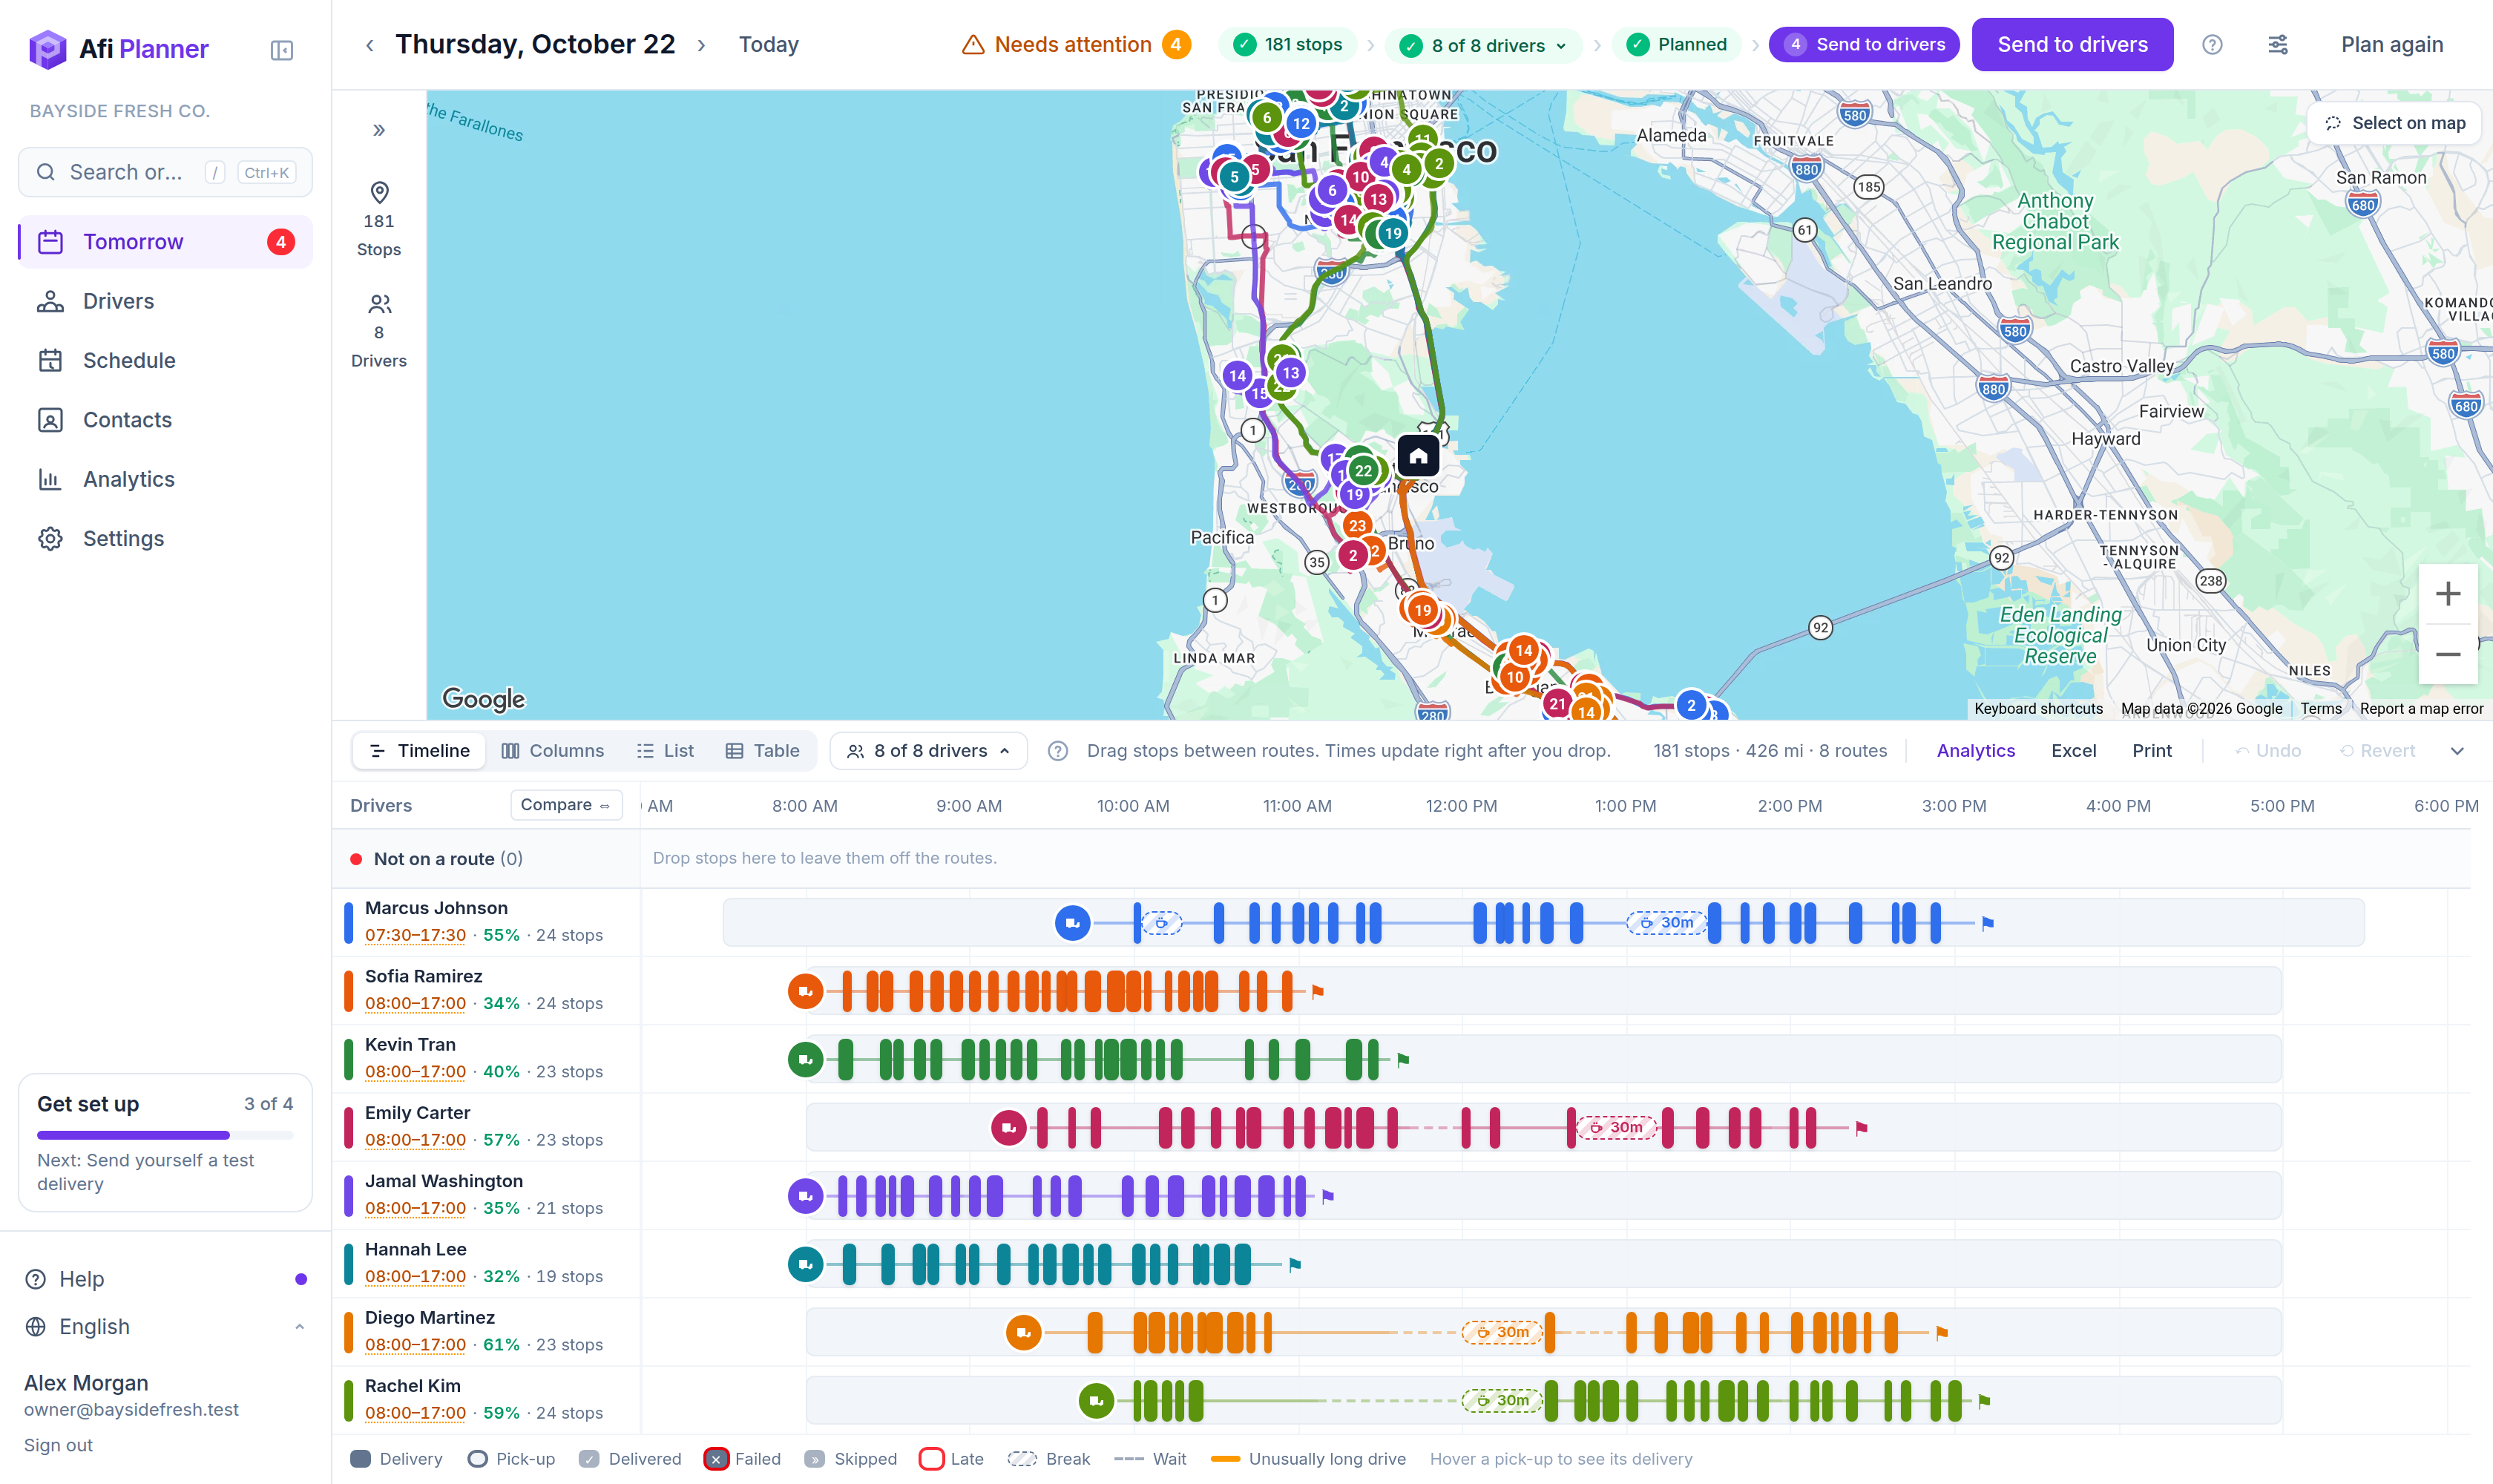
Step 6: Send them out
Click Send to drivers. Each driver gets their route on their phone, and your customers can get a message with their delivery window.
Tip: Not ready to send? Routes stay a draft until you send them, so you can adjust them first.
Step 7: See what your customers get
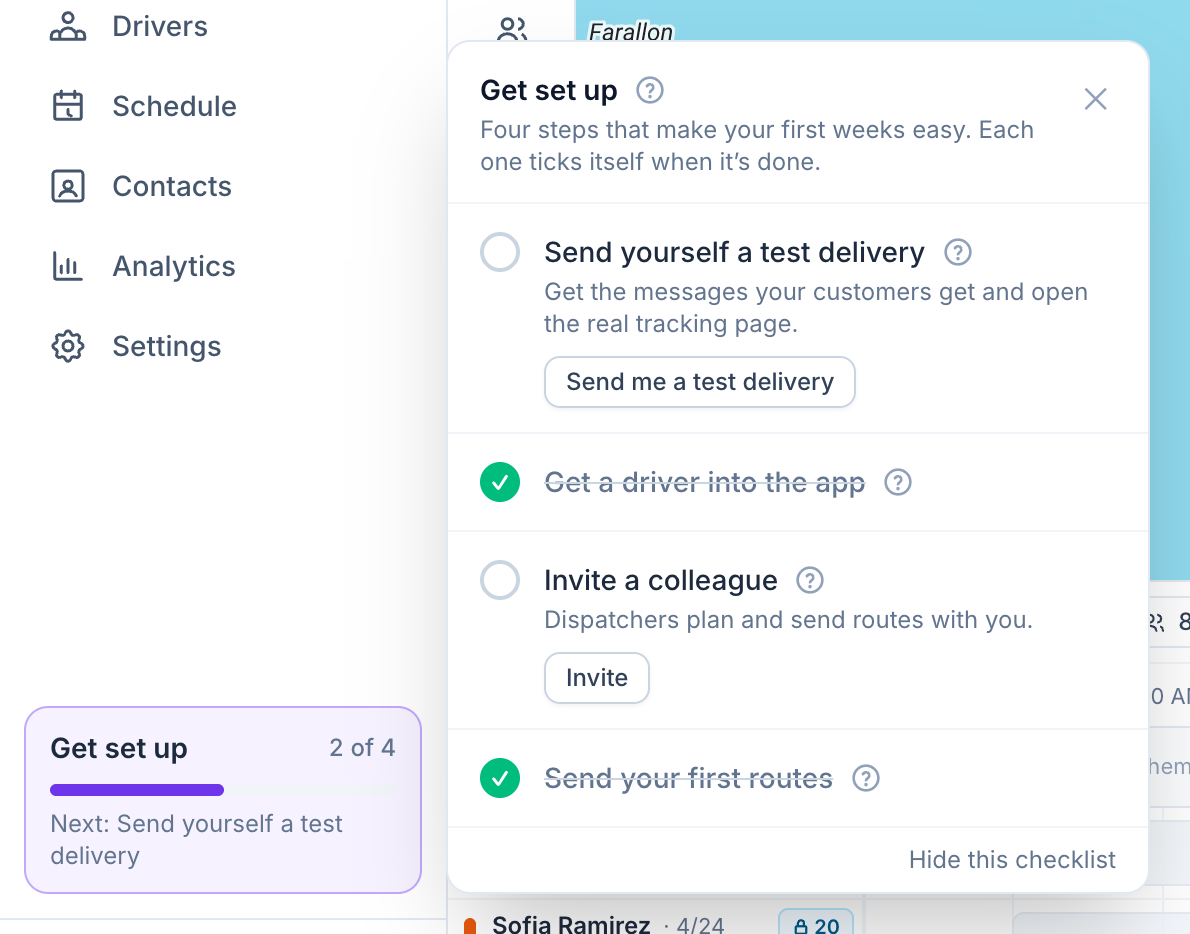
Open Help → Send me a test delivery. Afi Planner makes one order addressed to you at your depot and sends it the way real routes go out: you get the customer messages by email and open the real tracking page. The test stays out of your analytics, usage and plan limits. The Get set up checklist in the sidebar ticks off each step as you do it; owners see it for their first 30 days.
Related feature
Optimized routes that respect how your day really works →